Part III
I was told, when learning to paint the R/B Enigma that it would be one of the hardest things to paint, simply because of the large area and the way its painted, and of course the finishing touches which I will not be revealing how that’s done.
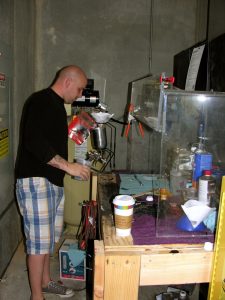
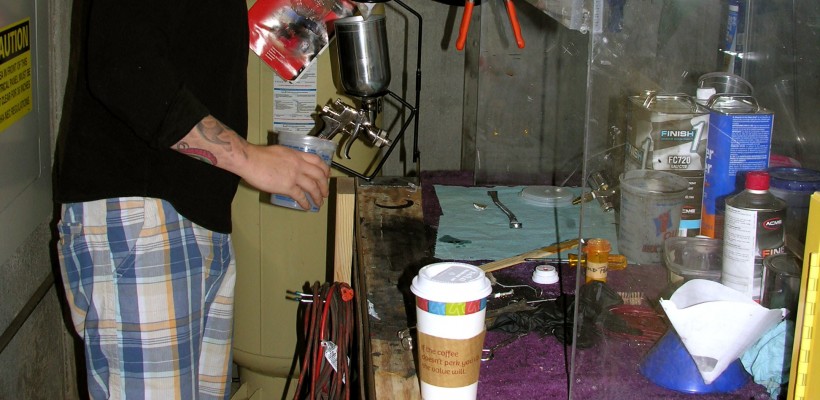
How I prep the Enigma will tell me how the rest of the paint job will go. I first take it all apart. There are a total of nine parts that need to be painted. I take the motor, and all the hardware out. I keep all of that together, if I lose any of it’s going to be a pain in the ass, believe me I had to find out the hard way. I sand all the parts, and then wipe them down with a shop towel. Next wipe it down with a tack rag and use an air hose to spray off any particles. I want nothing left behind, i.e.: Dust, hair, etc. I then lay down my black. The black takes two days to fully dry. If I didn’t let it dry for at least two days and tried to put a second coat of anything on, it would wrinkle, or have an “orange peel” look to it. Little bumps will be all over the fan parts, and that my friends, is not acceptable.
The next coat will actually be the Red/Blue. This has to go on perfect or else the finish product will show my mistakes. Sometimes lines from the actual spraying of the paint will come through or if I spray too long on one spot the paint will run. I forgot to mention ‘runs’ when I was talking about the black. I get runs sometimes, all through out the painting process. It happens when I stay too long on one spot on a piece that I am painting. When I say too long on one spot, I mean more than a millisecond. When I paint, it’s quick. It’s not like painting a wall or a house. First off it’s coming out of a pneumatic (air) gun or machine…I don’t like the word “gun”. Guns kill things; I’m not killing the fan. The air is pressurized at about 120 psi, but I set it so it’s only coming out at about 30psi, which is still pretty fast. Enough to take an eye out, then it would be a gun; not unlike a “Red Ryder carbine-action, two hundred shot Range Model air rifle with a compass in the stock and this thing which tells time” which according to some moms ‘will shoot your eye out’.
Now back to the fan, I lay down the R/B, which is called an intermediate coat, I want to get this coat on perfect, and not leave any of the black undercoat showing. After I am done, I hang up all the parts and then leave them to dry. Really I could put the final coat (clear coat) on the same day as the R/B but I like to give it a day to dry.
The next day I come back to the parts so they can be clear coated. I have a certain clear coat that works best for me, and I will not be telling anyone what I use, however it wouldn’t matter, as I mix in other things. The clear coat is the easiest part to get ‘runs’ in and if that happens, just like the rest of the painting process it has to be fixed once it dries, but the problem with letting it dry to fix it, unlike the other two painting steps, it takes at least ten days to fully dry. So if there are no problems with the painting process, I still like to wait a minimum of 10-12 days before I start my post-painting steps.
There are a lot of problems that can arise from, what some may say, a simple task, but in all honesty it’s difficult to get professional results when not paying attention to the details. That’s what it is all about in anything you do, whether you want to do it or not, you have to pay attention to the details, to get the desired results. This is my bread and butter. I love doing it, because it has become my muse, what I base everything else on. Everyone has a muse in every profession; decide what yours is and you too may be able to get the desired results out of anything you do.
Don’t forget to find me on Twitter and Facebook!